Proxus allows administrators to control which parts of the Unified Namespace (UNS) each role can access. This is done through UNS Topic Permissions, where you define path prefixes that are either allowed or denied for specific roles.
How It Works
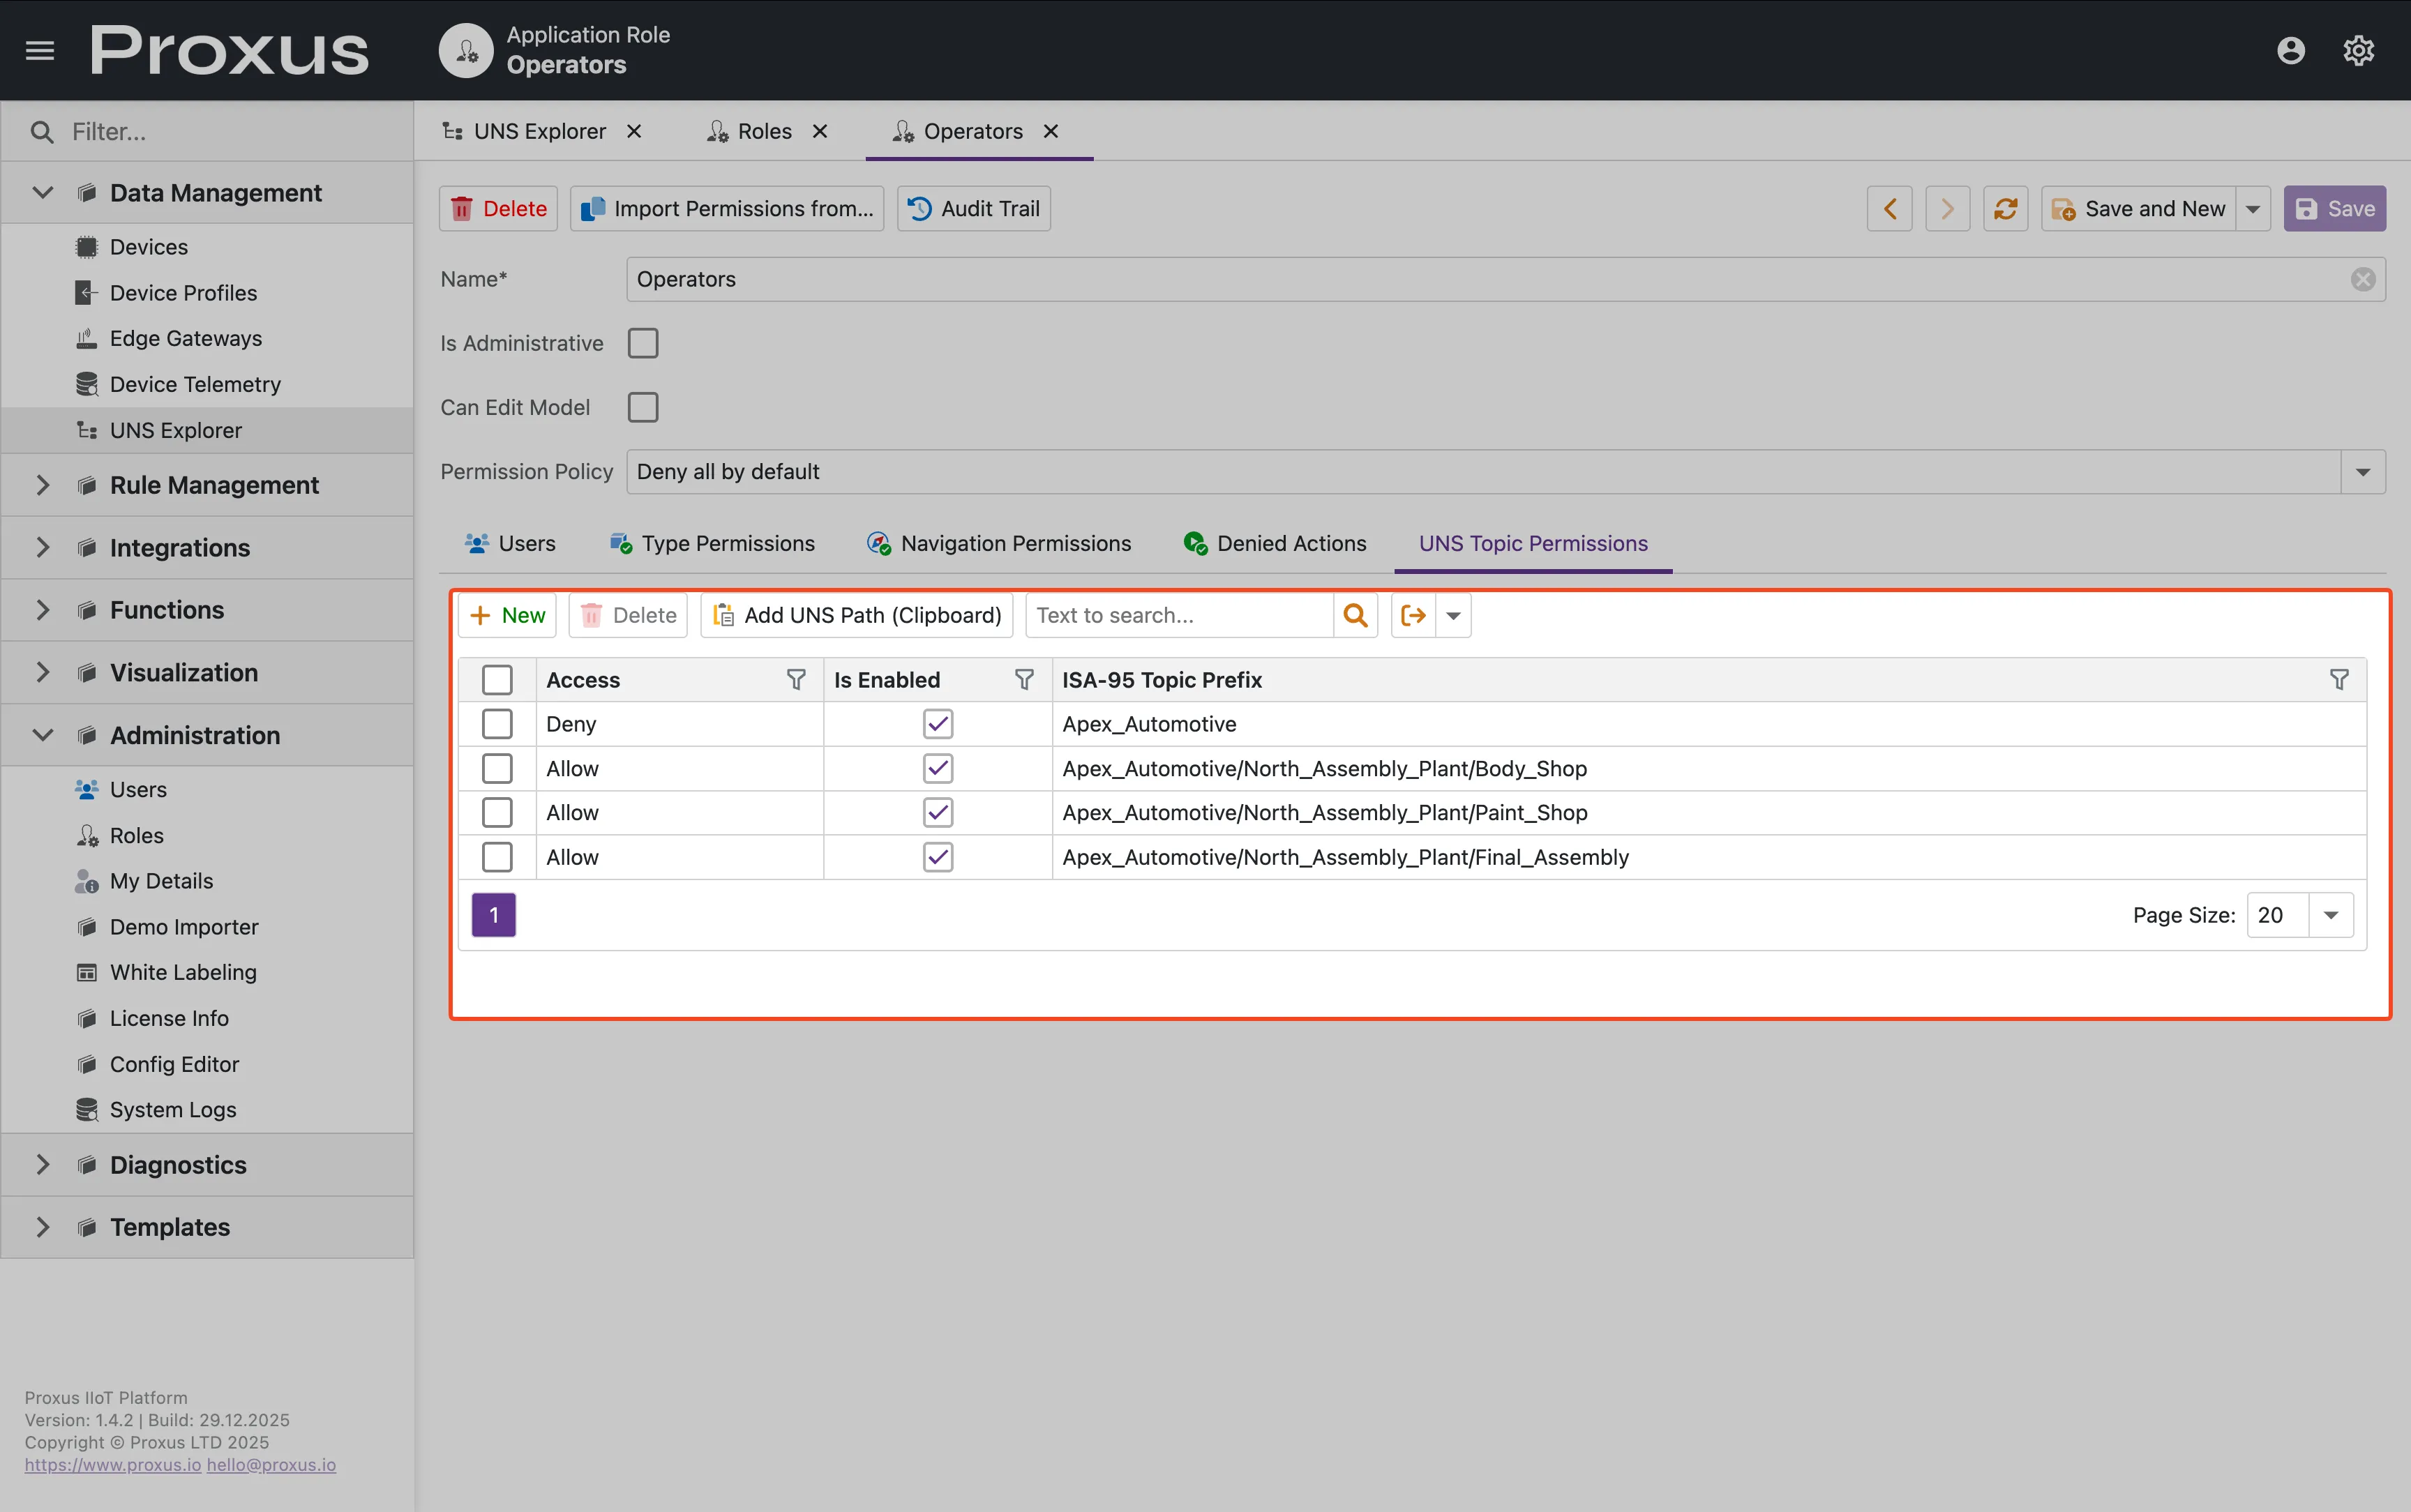
Each role can have multiple UNS Topic Permissions configured. Each permission has:
| Field | Description |
|---|---|
| Path Prefix | The UNS path to control (e.g., Apex_Automotive/Body_Shop) |
| Access Type | Allow or Deny |
| Is Enabled | Toggle to enable/disable the permission |
Permission Evaluation Logic
Proxus uses a "Longest Prefix Match Wins" algorithm:
Most specific rule wins. If a user has both an Allow and Deny rule that match a path, the longer (more specific) prefix takes precedence.
Example
| Rule | Type |
|---|---|
Apex_Automotive | Deny |
Apex_Automotive/Body_Shop | Allow |
Apex_Automotive/Utilities | Allow |
Result:
Apex_Automotive→ Denied (14 chars)Apex_Automotive/Paint_Shop→ Denied (inherits from Apex_Automotive)Apex_Automotive/Body_Shop→ Allowed (26 chars > 14 chars)Apex_Automotive/Body_Shop/BIW_Line→ Allowed (inherits from Body_Shop)Apex_Automotive/Utilities→ Allowed
Configuring Permissions via Role Editor
Navigate to Roles
Go to Administration → Roles and select or create a role.
Open UNS Topic Permissions
Click the UNS Topic Permissions tab.
Add Permission
Click New to add a permission.
Configure
Enter the Path Prefix (e.g., Apex_Automotive/Body_Shop), select Access Type (Allow or Deny), and ensure Is Enabled is checked.
Save
Click Save to apply the changes.
Quick Permission Assignment (Admin Context Menu)
Administrators can quickly assign permissions directly from the UNS Explorer:
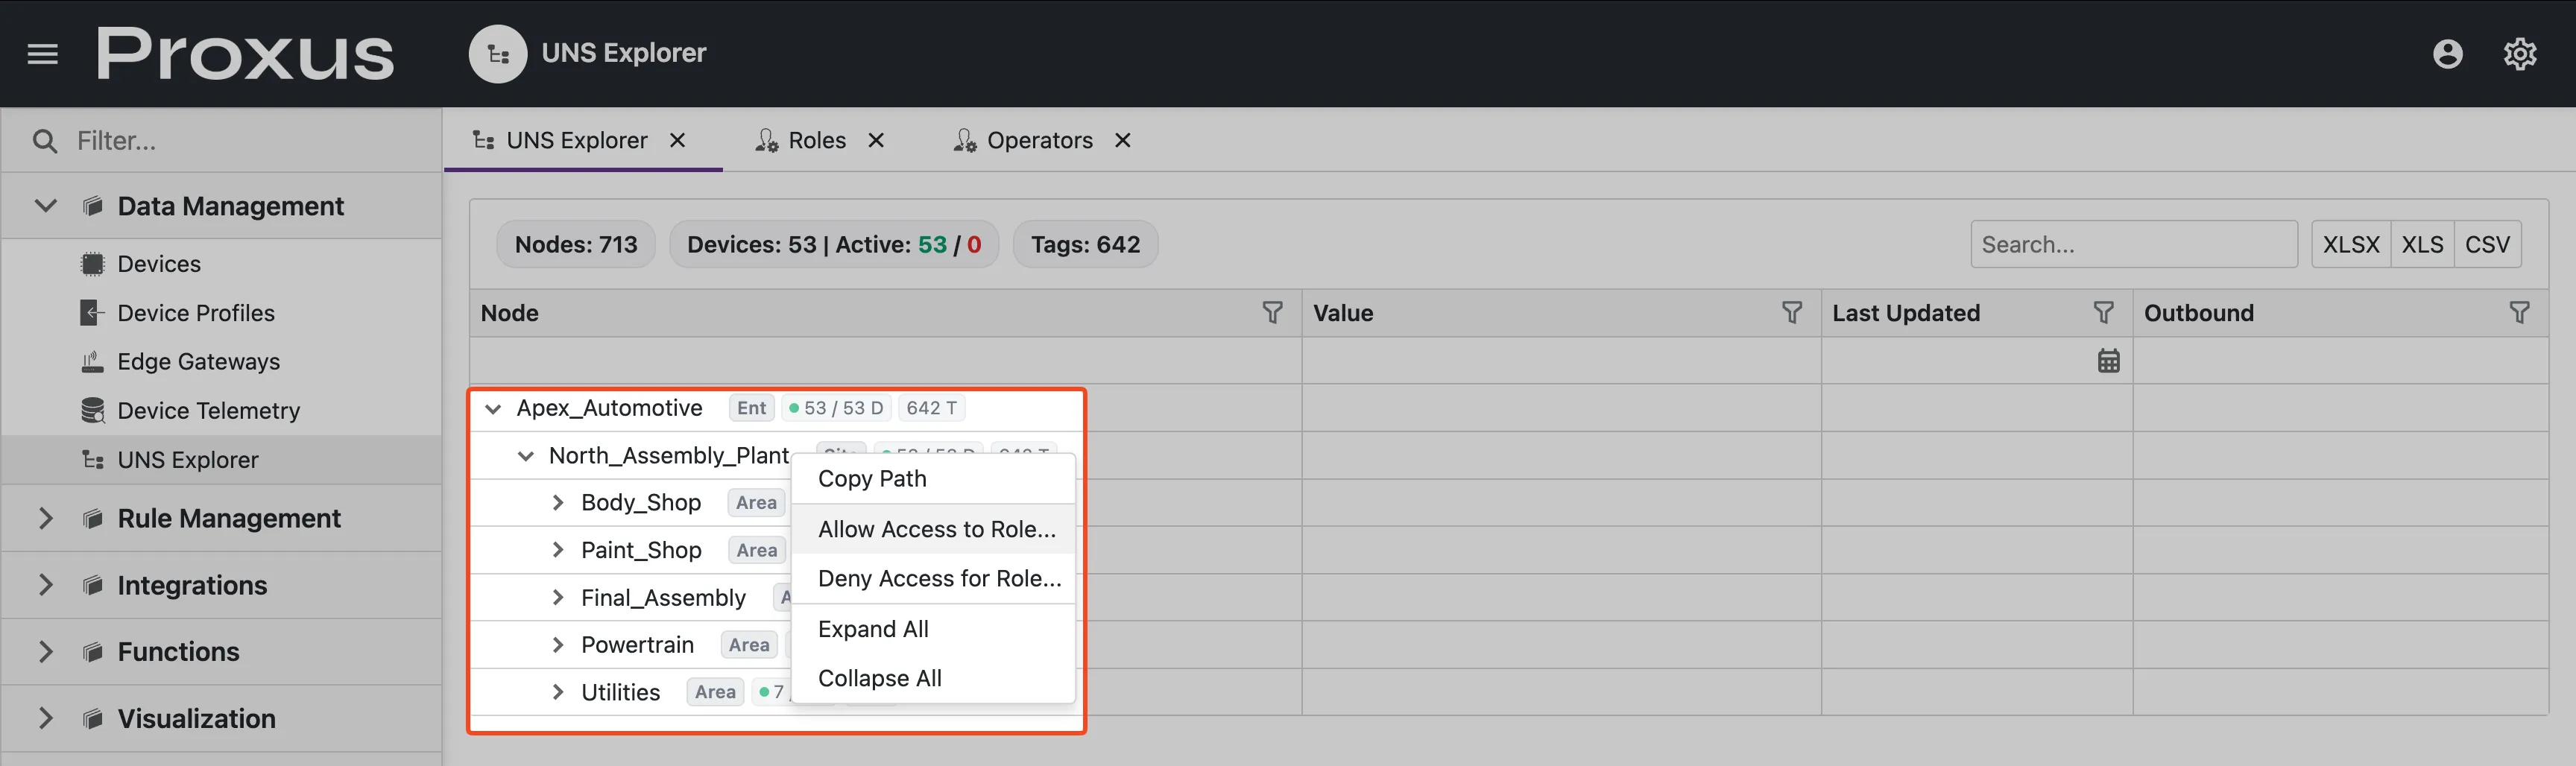
Open UNS Explorer
Navigate to Data Management → UNS Explorer.
Right-Click on Node
Right-click on any node in the tree.
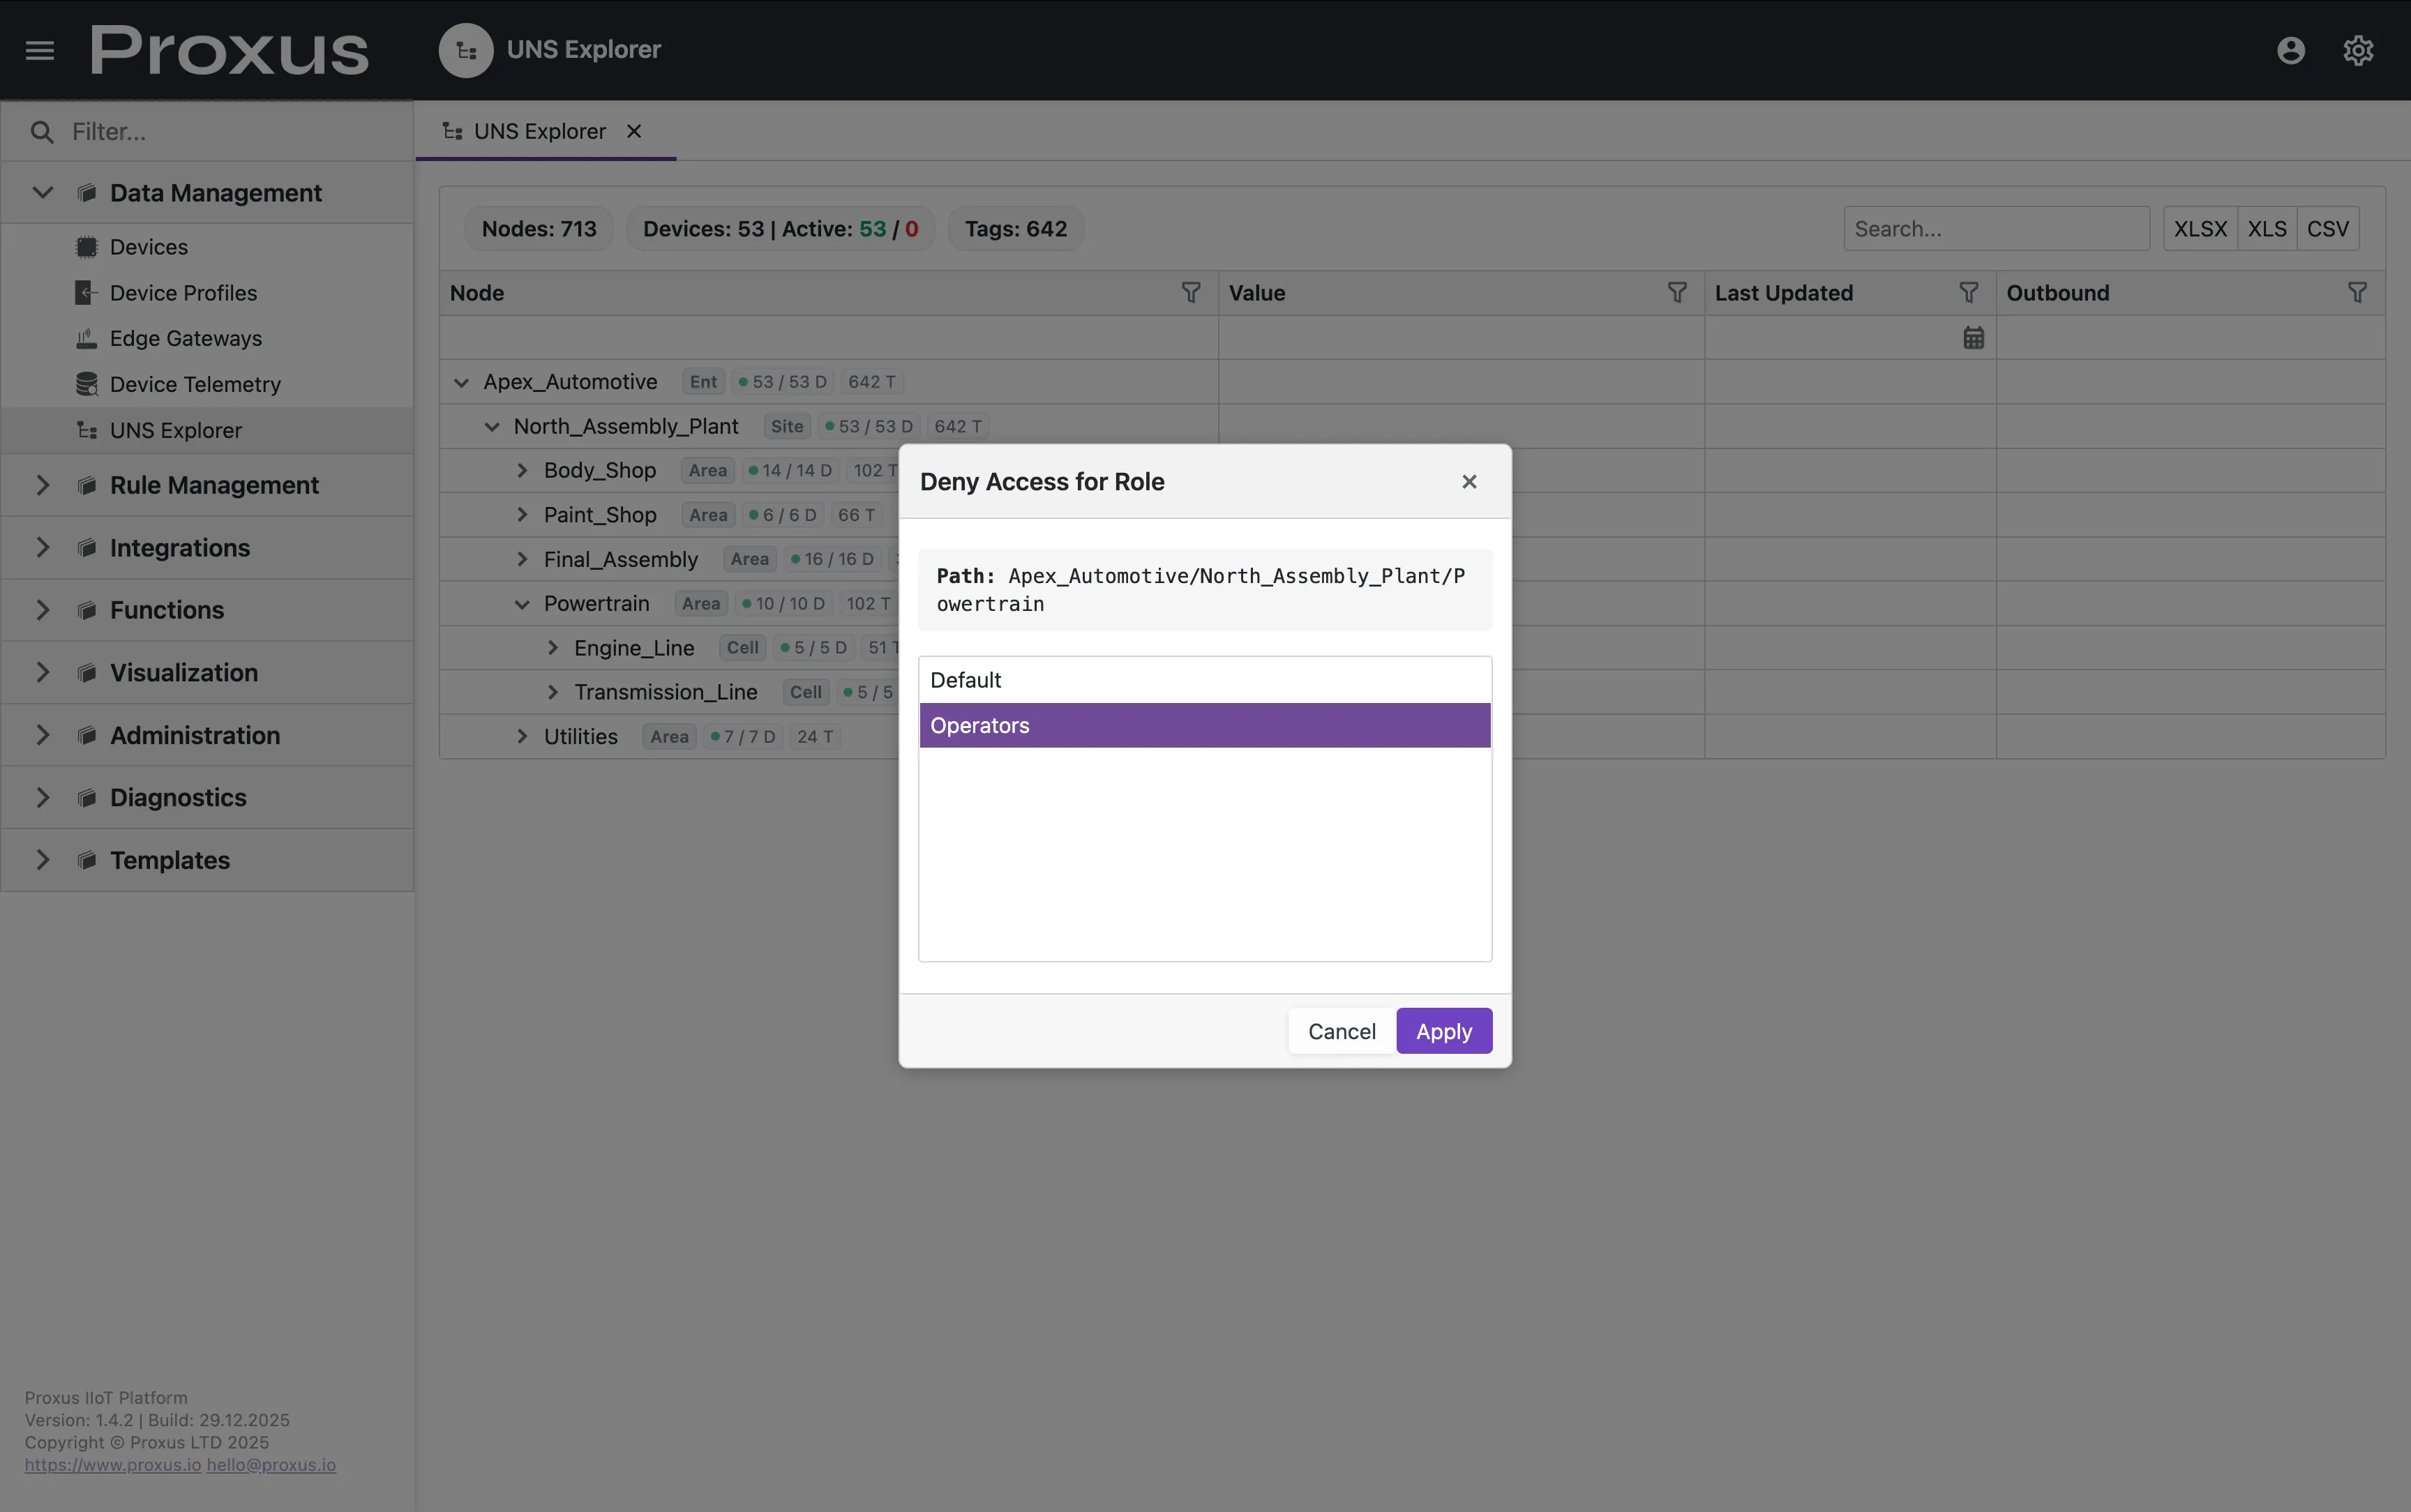
Select Action
Choose Allow Access to Role... or Deny Access for Role....
Select Role
Pick a role from the popup and click Apply.
The permission is immediately saved to the selected role.
Best Practices
Start Restrictive, Then Allow Specific Paths. A common pattern is to deny access at a high level and then allow specific areas.
Example Pattern
- Deny:
Apex_Automotive(blocks everything by default) - Allow:
Apex_Automotive/Body_Shop(operators can see Body Shop) - Allow:
Apex_Automotive/Utilities(maintenance can see Utilities)
Path Format
- Use forward slashes
/as separators - Paths are case-sensitive
- No leading or trailing slashes needed
- Example:
Enterprise/Site/Area/Line/Device
Troubleshooting
| Issue | Solution |
|---|---|
| User sees no data in UNS Explorer | Check if role has any Allow permissions configured |
| User sees data they shouldn't | Check for overly broad Allow rules or missing Deny rules |
| Permission changes not taking effect | User may need to log out and back in |
| Deny rule not blocking access | A more specific Allow rule may be overriding it |